
Guided V-carve inlay
An inlay is two parts: a V-carved pocket in the base board and a mirrored plug in a contrasting wood, glued in and planed flush. CarvCAM works out both from one shape. Guided inlay is a Pro tool; the Heart inlay coaster example is free.
How the fit works
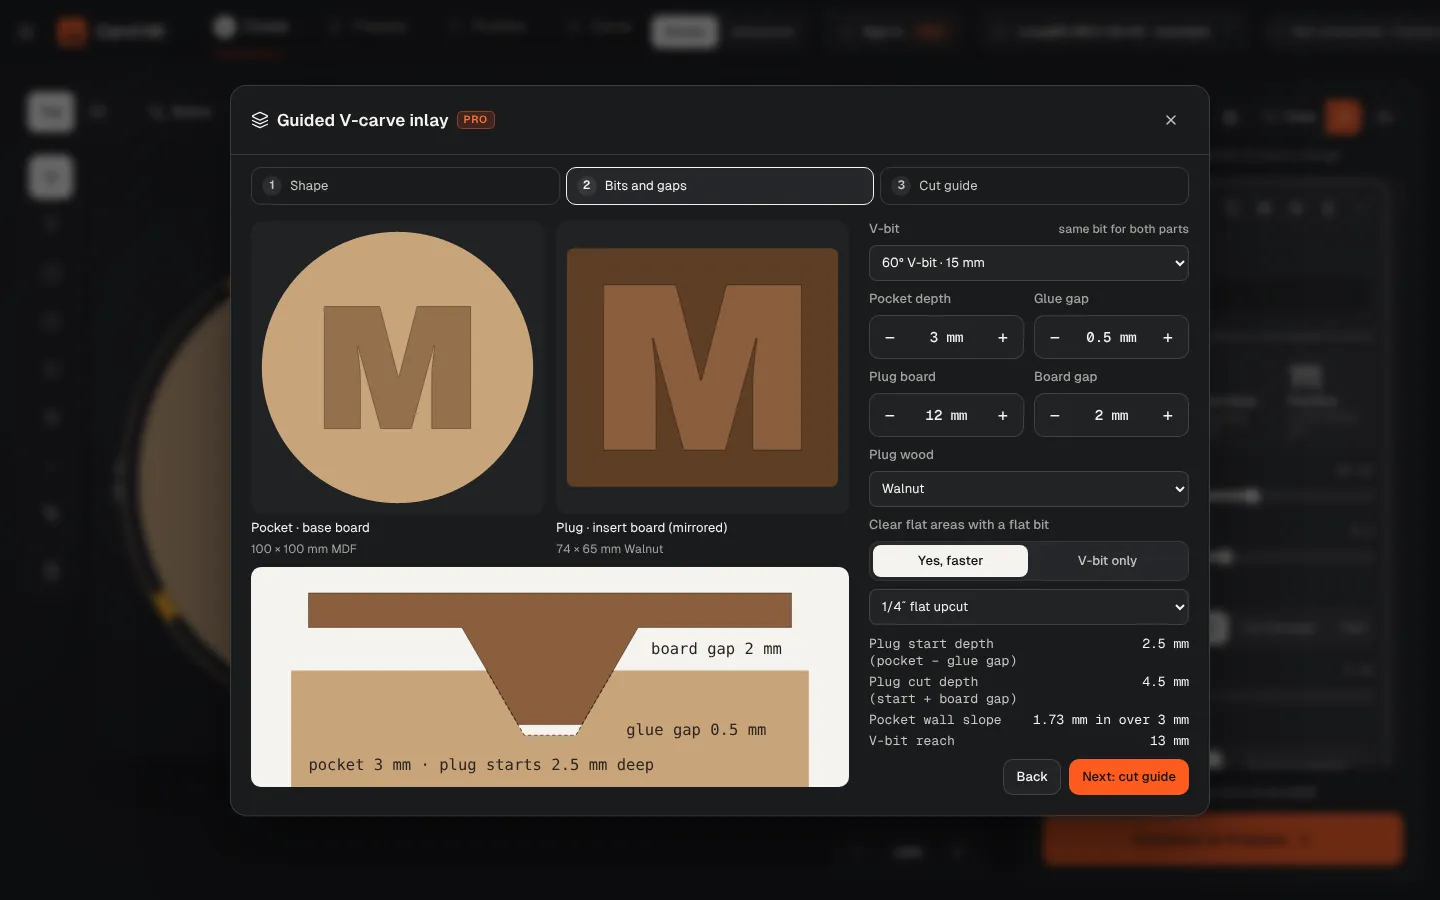
Both parts are cut with the same V-bit, so their walls have the same slope and wedge together. The plug isn't cut to the full pocket depth: it starts shallower by the glue gap, so its walls touch the pocket walls before its tip reaches the bottom. That gap at the bottom holds the extra glue. The plug board is cut deeper by the board gap, so the two boards stay a little apart after gluing and you can saw the plug board off in that gap.
| Number | What it is | Default |
|---|---|---|
| Pocket depth | How deep the V-bit cuts the pocket walls | 3 mm |
| Glue gap | Space left at the bottom of the pocket | 0.5 mm |
| Plug start depth | Pocket depth − glue gap: where the V-bit starts at the edge of the plug | 2.5 mm |
| Board gap | Space between the two boards once glued | 2 mm |
| Plug cut depth | Plug start depth + board gap | 4.5 mm |
Make an inlay
Pick the shape
Select a closed shape, an icon, a drawing or some text, then click Guided inlay on its row or on the board's toolbar. Bold shapes inlay best: thin strokes and sharp inside points make fragile plugs. Archivo Black is a good inlay font.
Bits and gaps
Pick the V-bit (the same bit cuts both parts), Pocket depth, Glue gap, Plug board thickness, Board gap and Plug wood. Optionally Clear flat areas with a flat bit to cut the bottom faster. CarvCAM warns if the V-bit can't reach or a board is too thin.
Cut guide
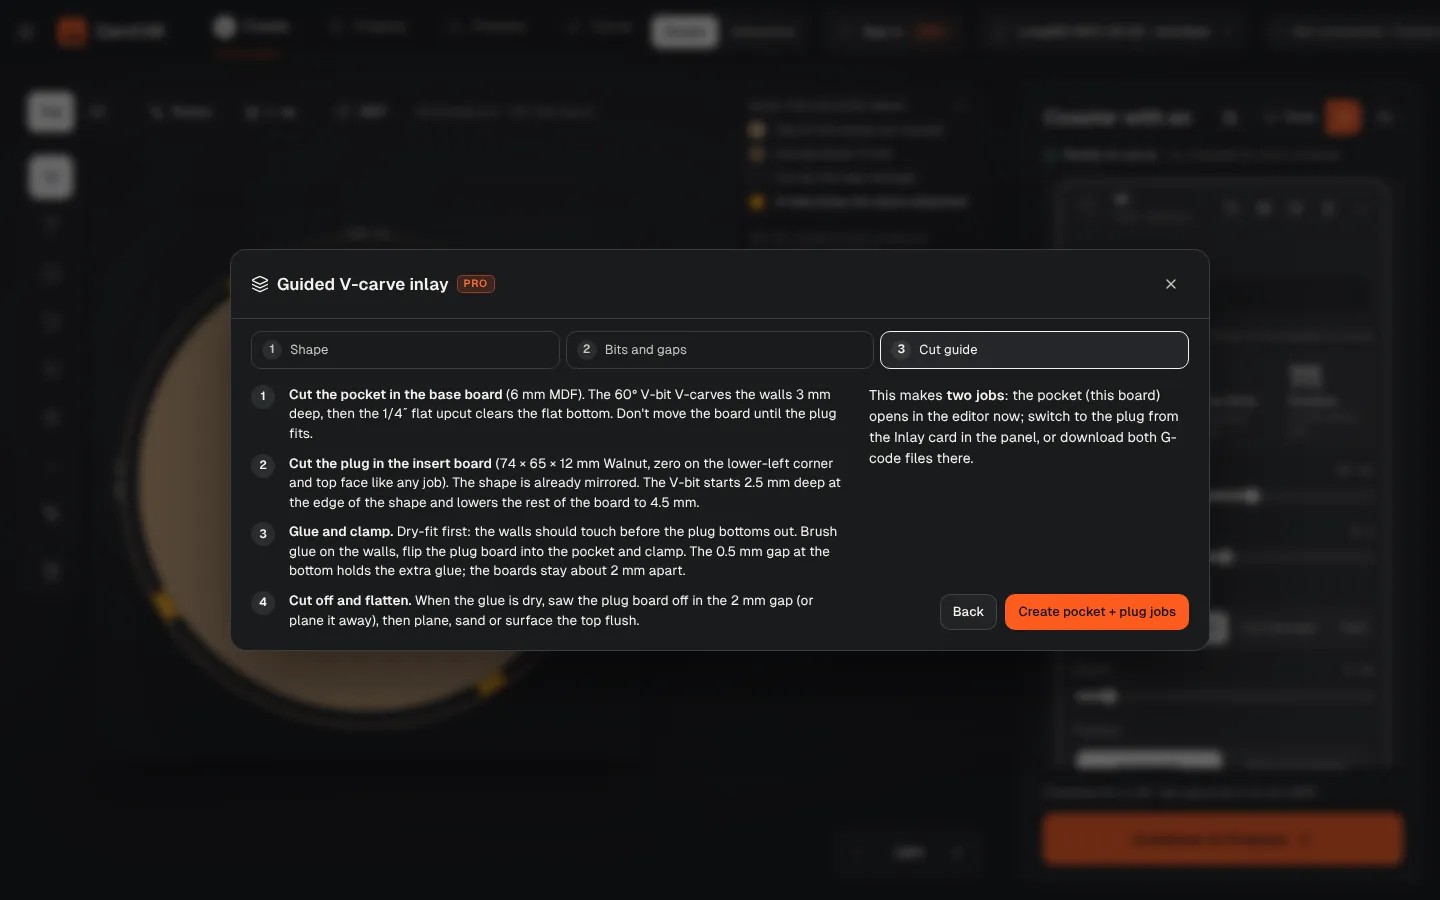
Read the four steps, then Create pocket + plug jobs. The pocket opens in the editor; the plug is linked to it.
Cut the pocket
Carve the base board. Don't move it until the plug fits.
Cut the plug
On the Inlay card in the panel, click Open the plug job. Zero on the lower-left corner and top face of the plug board like any job. The shape is already mirrored.
Glue, cut off, flatten
Dry-fit, glue the walls, flip the plug board into the pocket and clamp. When dry, saw the plug board off in the board gap, then plane, sand or surface the top flush.
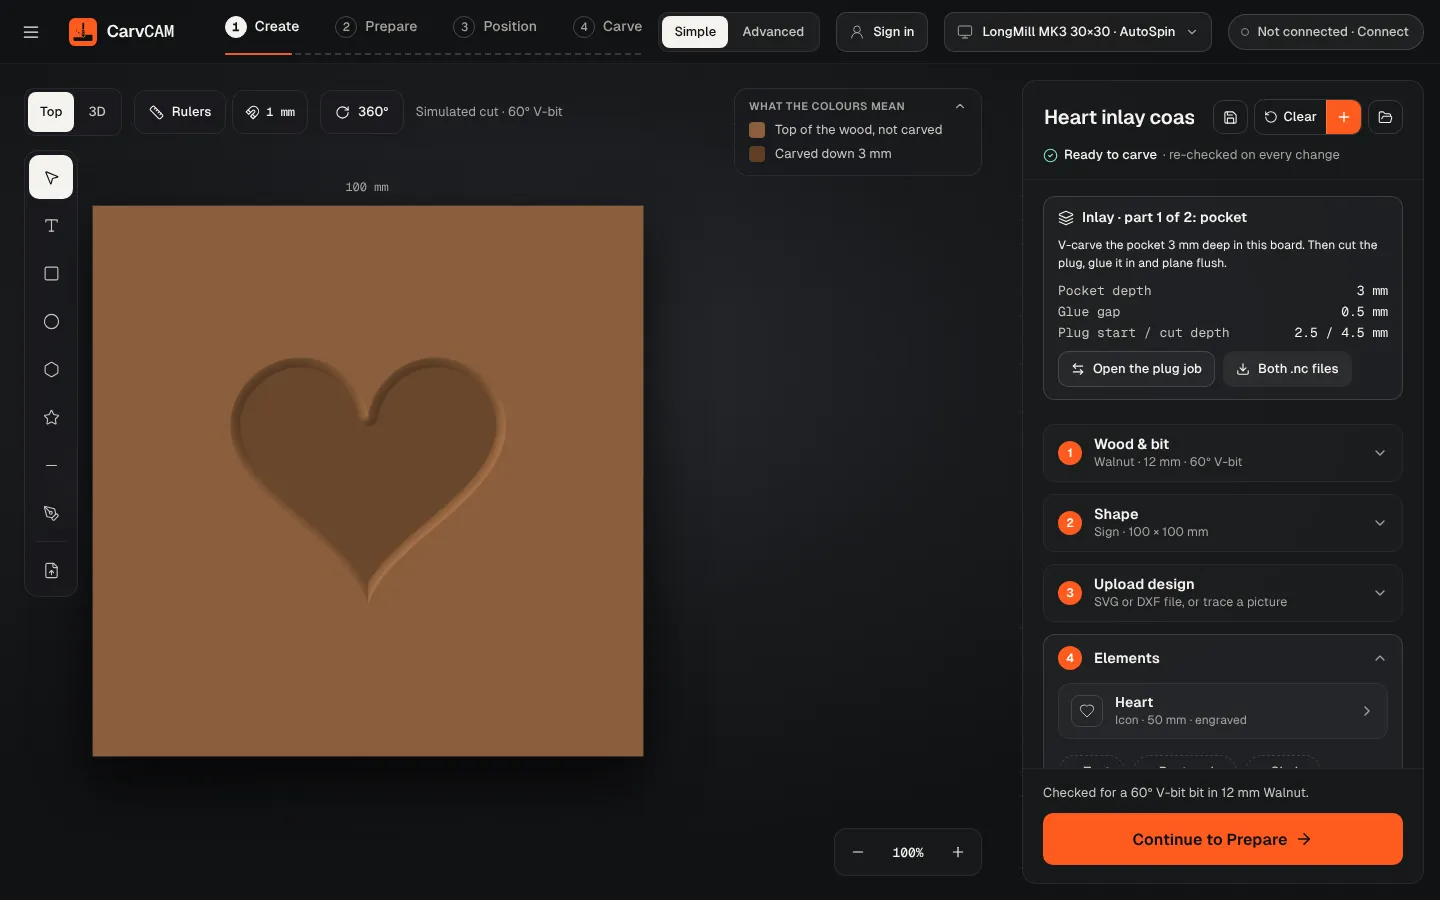
Both .nc files on the Inlay card downloads the pocket and the plug G-code, pocket first. Handy for another sender or a USB stick.
Open Heart inlay coaster in First cuts, or Try the free heart inlay coaster in the Pro prompt: a walnut coaster with a pine heart. Step by step: Cut a V-carve inlay coaster.