
Quickstart: carve your first sign
Five steps from a blank board to a carved sign. Each step links to the full page if you want more detail.
You need CarvCAM installed, your machine assembled, a board clamped nearby, a bit in the router and the touch plate. No machine yet? Pick Simulator in step 3 and follow along.
Design the sign
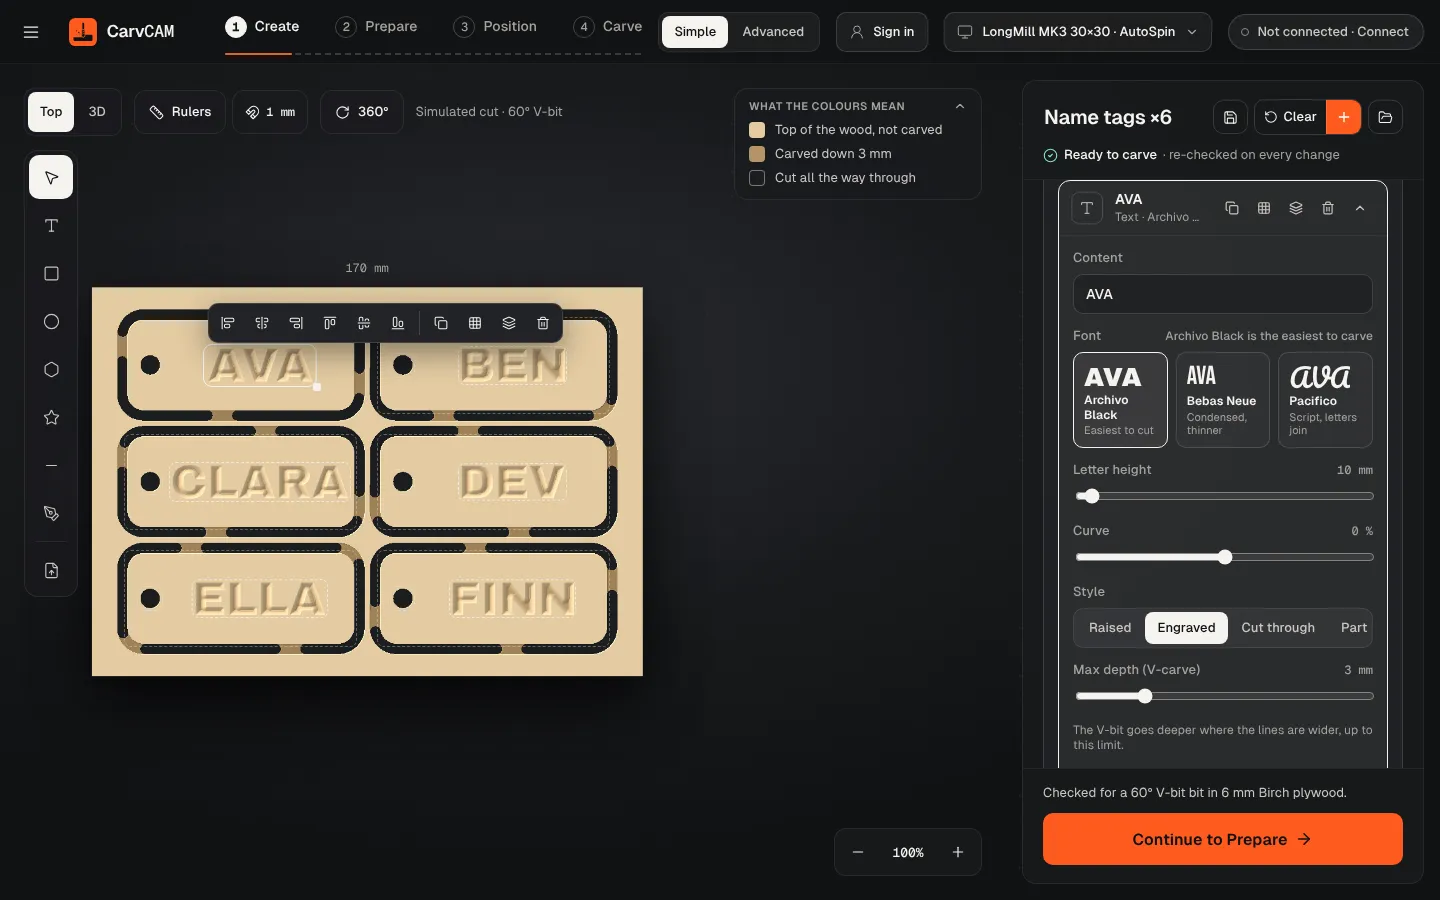
Open Create, click + Text and type your words. Pick a font and drag Letter height until the text fills the board. See The Create screen.
Prepare the cut
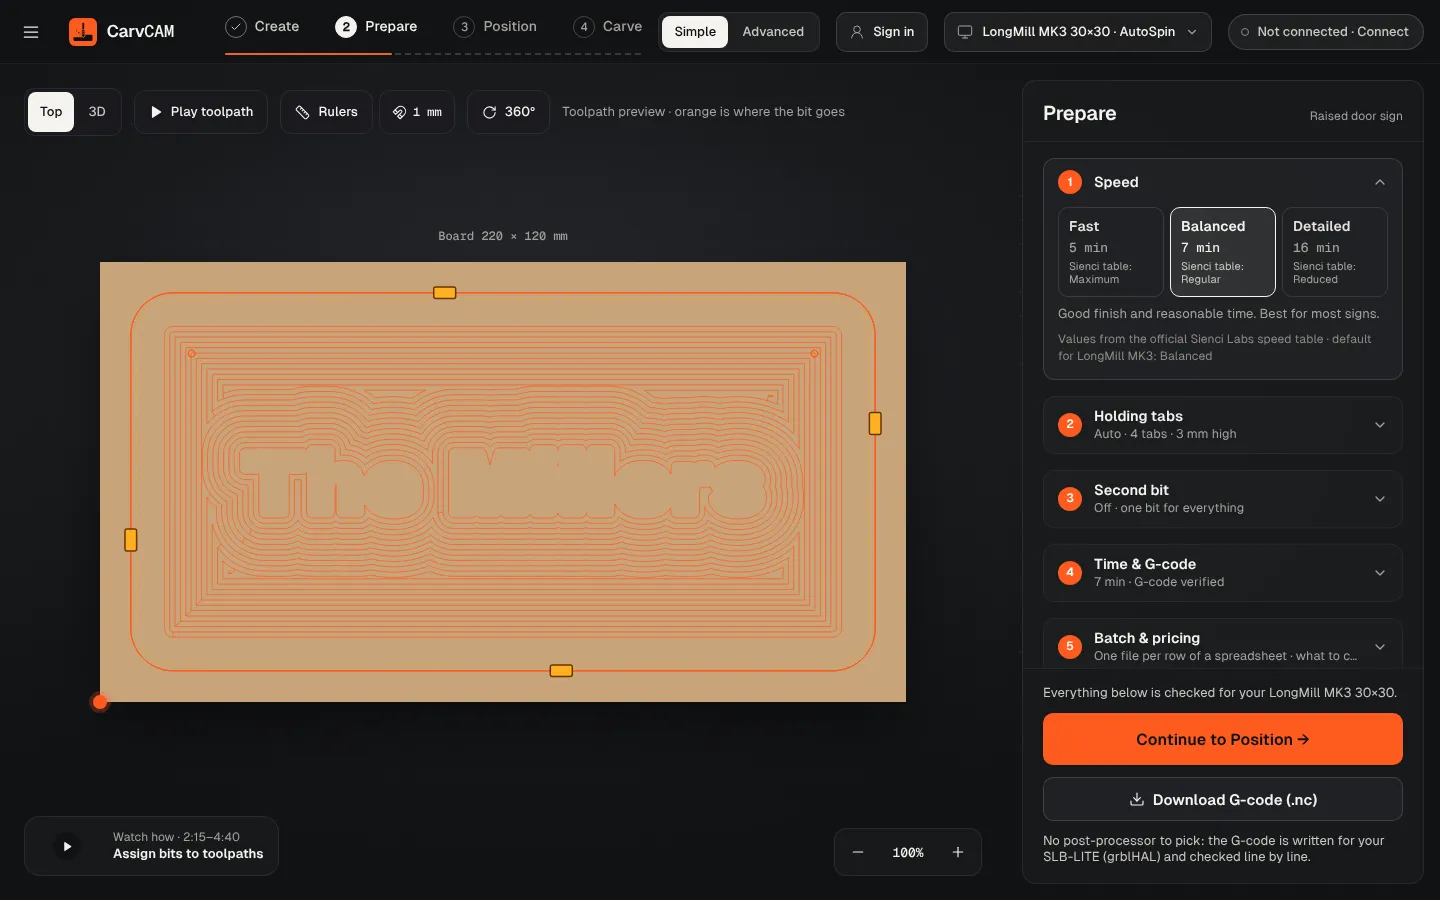
Click Continue to Prepare and choose Balanced. Check the time and the board size in the summary. See Prepare the carve.
Connect the machine
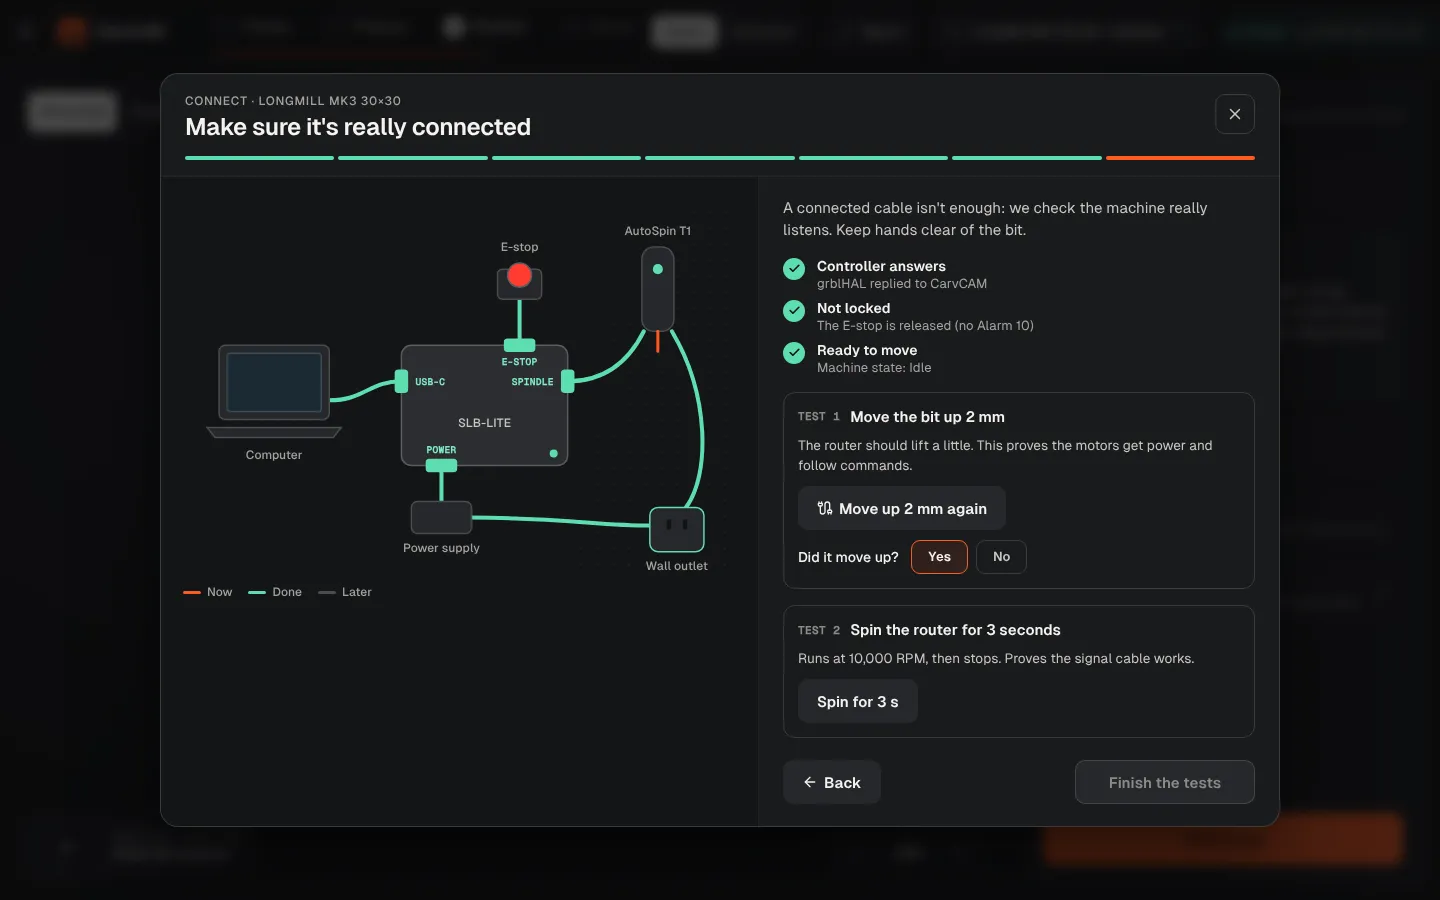
Click Not connected at the top. Follow the cable checks, pick your controller and press Connect. The Z lifts 2 mm and the bit spins for 3 seconds to prove it works. See Connect your machine.
Home, clamp and zero
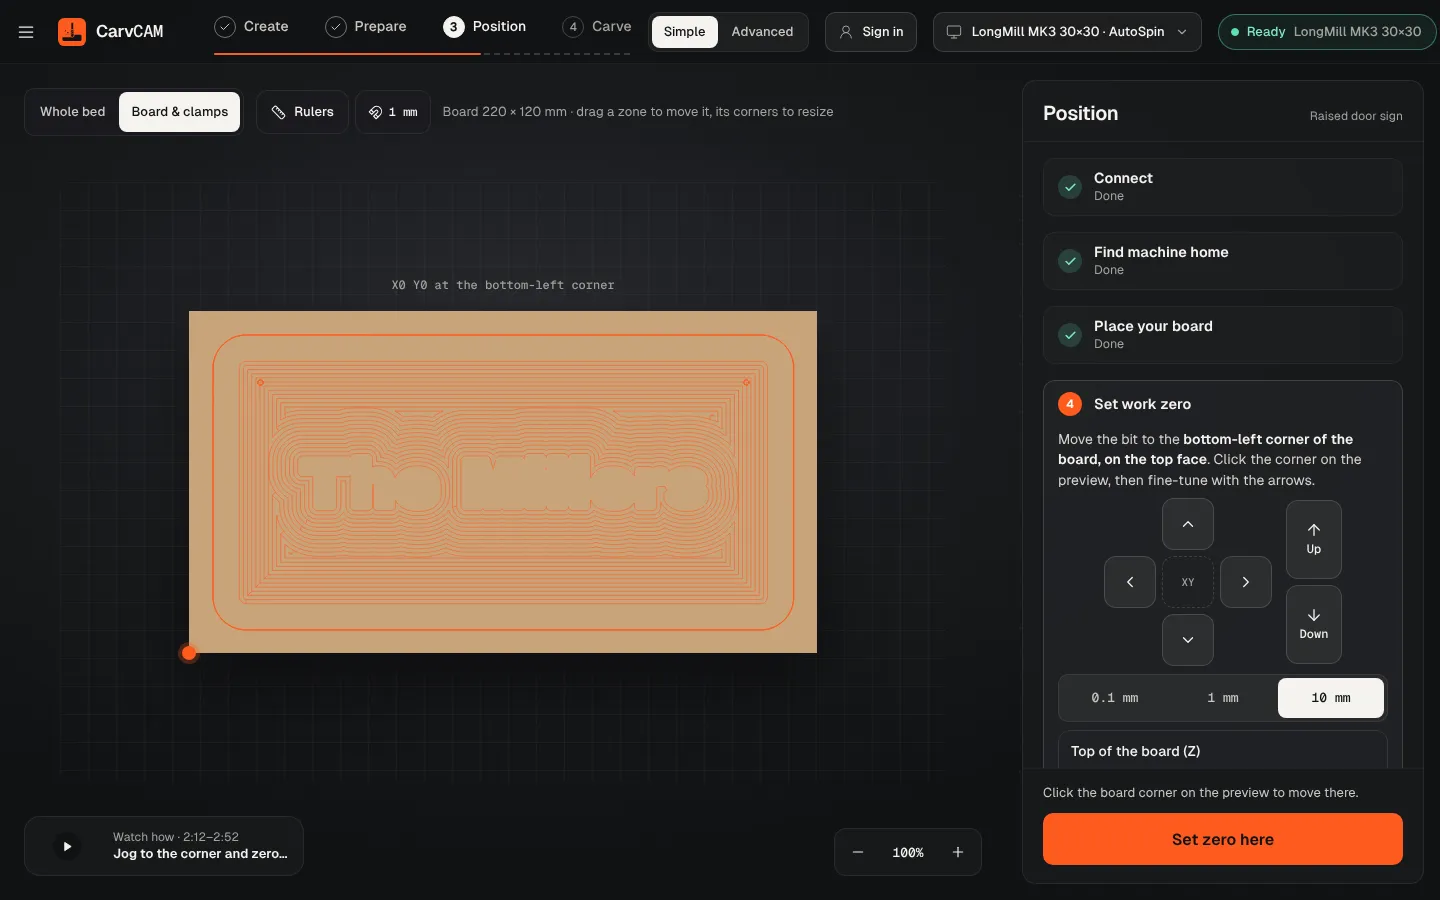
In Position, click Find home, clamp the board, press Measure height with the touch plate and set zero on the bottom-left corner. See Home, clamp and set zero.
Carve
Tick the checklist, put your glasses on and press Start carving. Space pauses, Esc stops. See Run the carve.
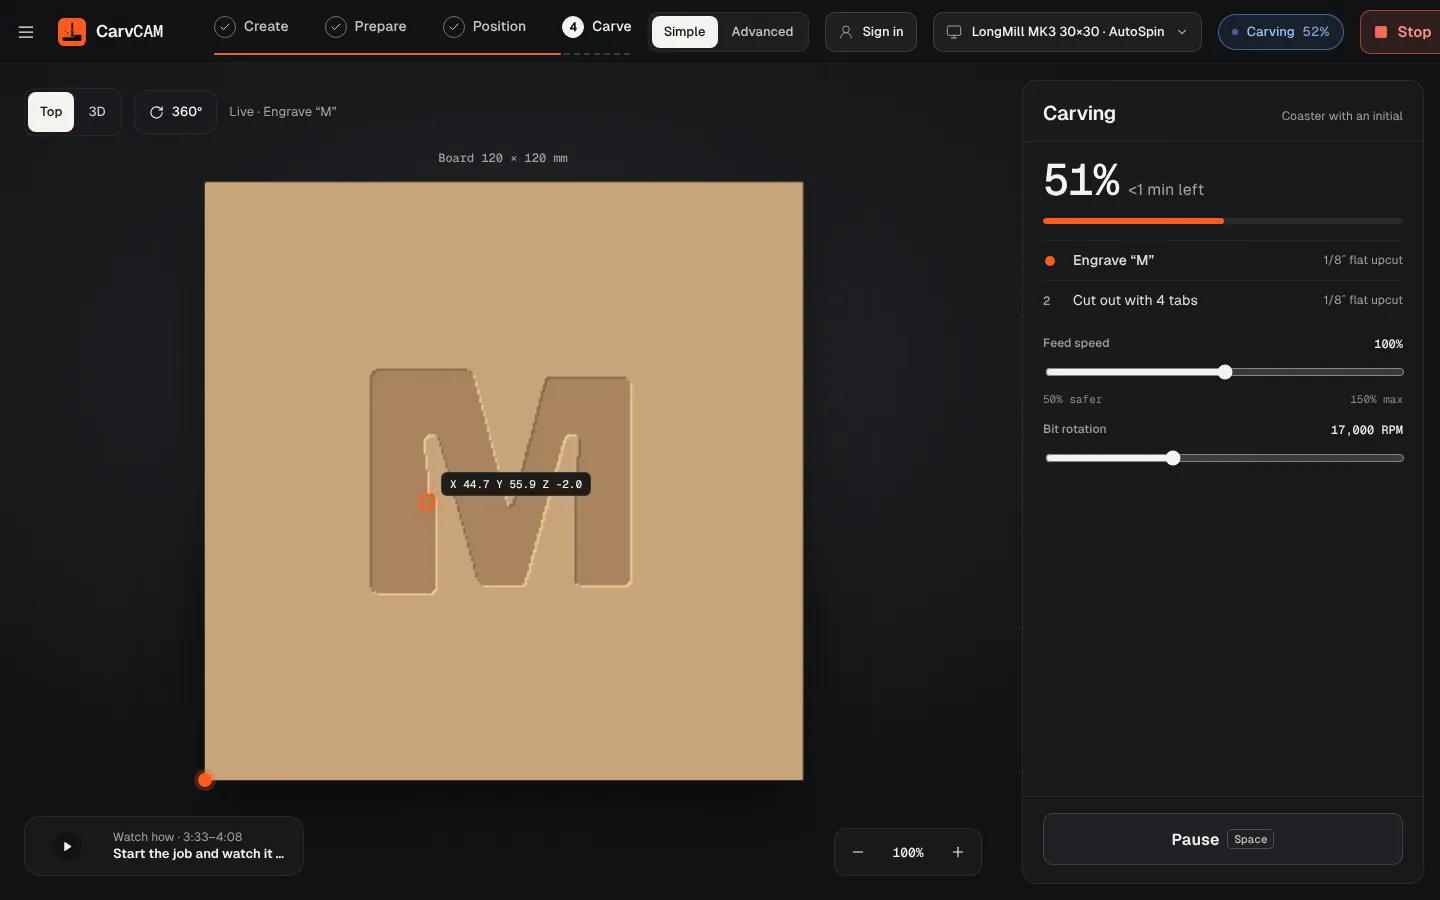
Do an air cut first: set work zero about 10 mm above the board (or take the board off) and run a small job. The first time you press Start carving on each machine, CarvCAM asks you to confirm the air cut, a hand on the E-stop and a clear path before it moves. Read the first carve checklist.