
Design with Claude (CarvCAM connector)
Add the CarvCAM connector to Claude and describe the sign you want. Claude designs it with CarvCAM's own engine, checks it, and shows the four steps right in the chat. Open it in CarvCAM to carve.
What it does
- Designs signs and lettering: text, fonts, icons, borders, cut styles, board size and wood
- Checks the design with the same engine as the app: Ready to carve, or what to fix and how, time, operations, and Sienci feeds and speeds for your machine and bit
- Shows a picture of the carved board and the steps in the chat
- Gives you an Open in CarvCAM link that puts the project in My projects
- Makes the verified G-code (.nc) if you ask for the file
The connector only designs and checks. You always set zero and press Start carving yourself in CarvCAM. On a new machine, do an air cut first.
Connect CarvCAM to Claude
Open Connectors
In Claude (web or desktop app), open Settings › Connectors and click Add custom connector. On Team and Enterprise plans an owner adds it once in the organization settings; then everyone can turn it on.
Add the URL
Name:
CarvCAM. URL:https://carvcam.com/mcp. No sign-in or API key is needed: leave the advanced settings (OAuth Client ID and Secret) empty, then click Add.Turn it on in a chat
In a new chat, open the tools menu (the + or sliders button under the message box) and make sure CarvCAM is on. When Claude first uses a tool, it asks you to allow it: choose Always allow for the CarvCAM tools.
If the chat shows an old layout or a tool is missing, open Settings › Connectors › CarvCAM and click Disconnect, then connect it again. Start a new chat afterwards.
Ask for a design
Say what you want in plain words. Size, wood, machine and bit help, but Claude asks or picks sensible defaults if you leave them out. A few to try:
- “Make a 320 × 170 mm walnut sign for my LongMill MK3 that says ‘The Millers’, with ‘EST. 2026’ and a small heart.”
- “A 12 inch round pine sign that says ‘Welcome’, V-carved, for my AltMill 4×4.”
- “Six name tags, 80 × 30 mm, MDF, names: Ana, Bruno, Carla, Diego, Eva, Felix.”
- “House number 42, 200 × 120 mm oak, outline cut out with tabs.”
Claude first reads the options CarvCAM offers (machines, bits, materials, fonts, icons), designs the project, and repeats the check until it's Ready to carve.
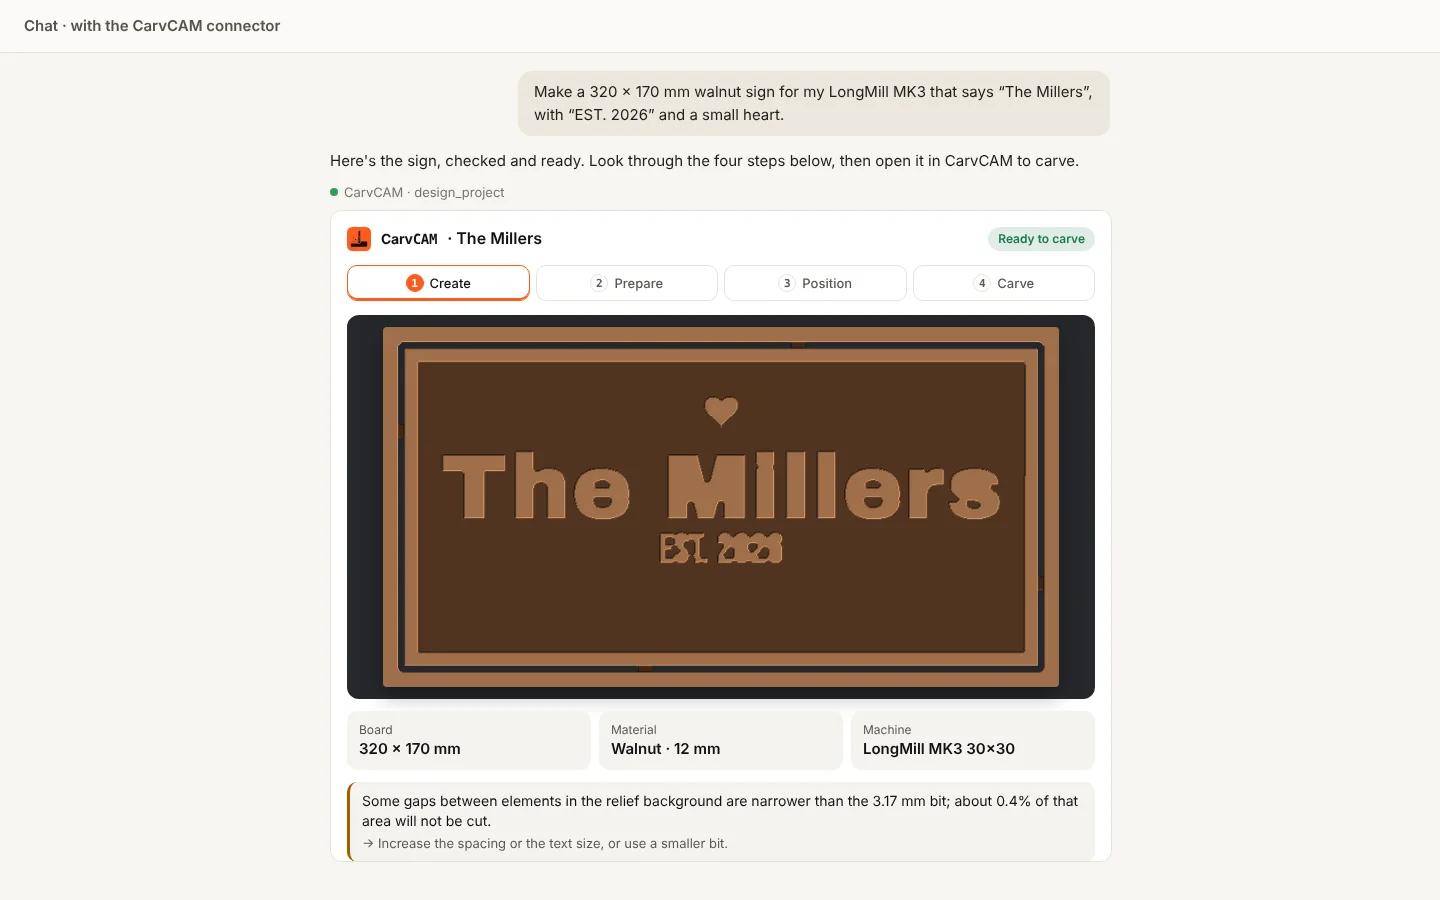
See the result in the chat
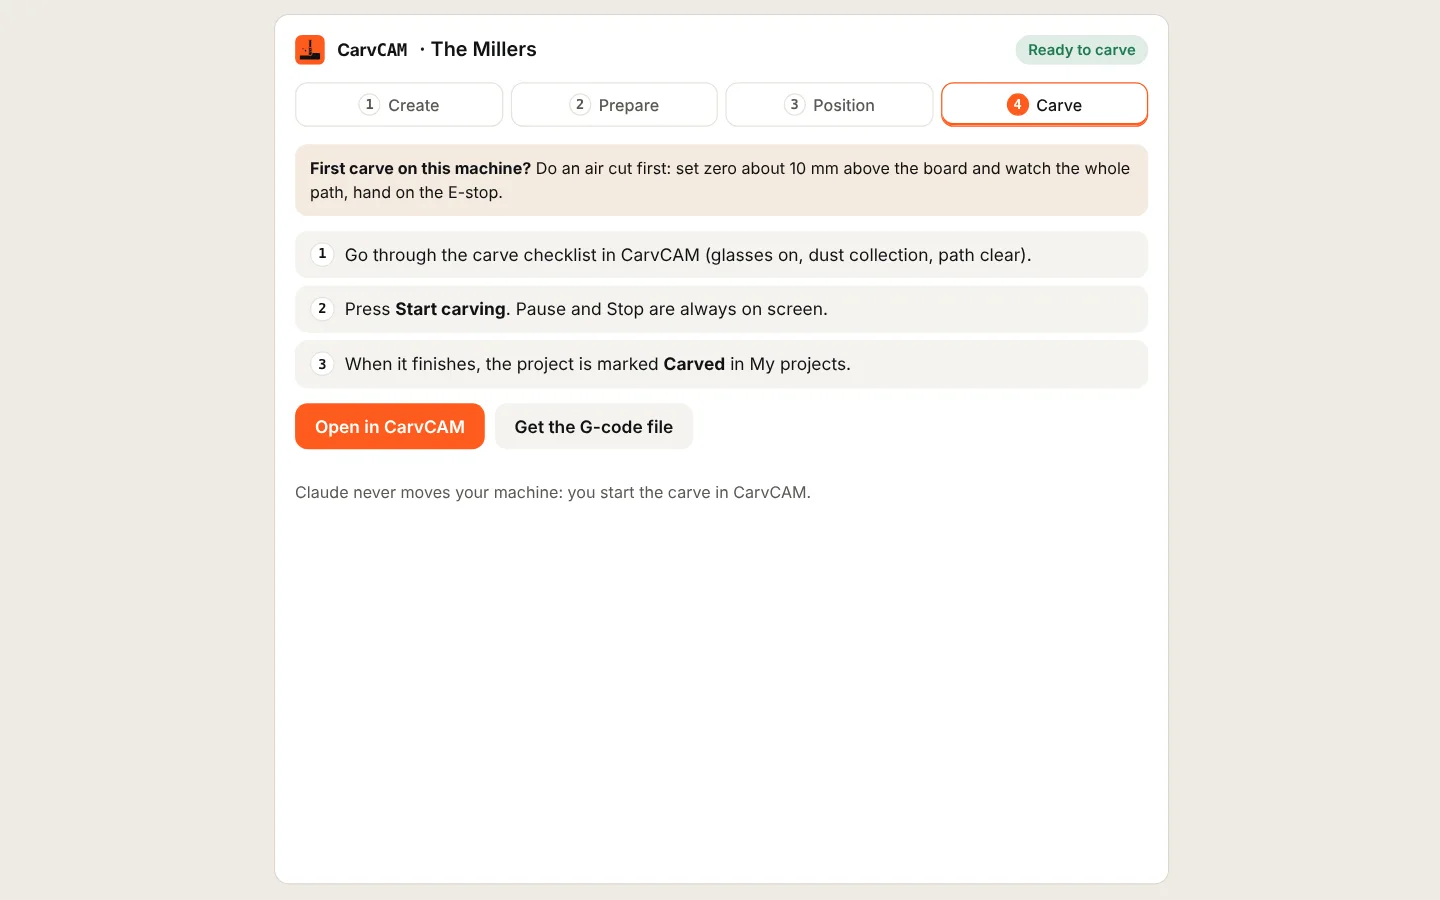
The result appears as a card with the same four steps as the app. Click a step to look at it; nothing runs on your machine.
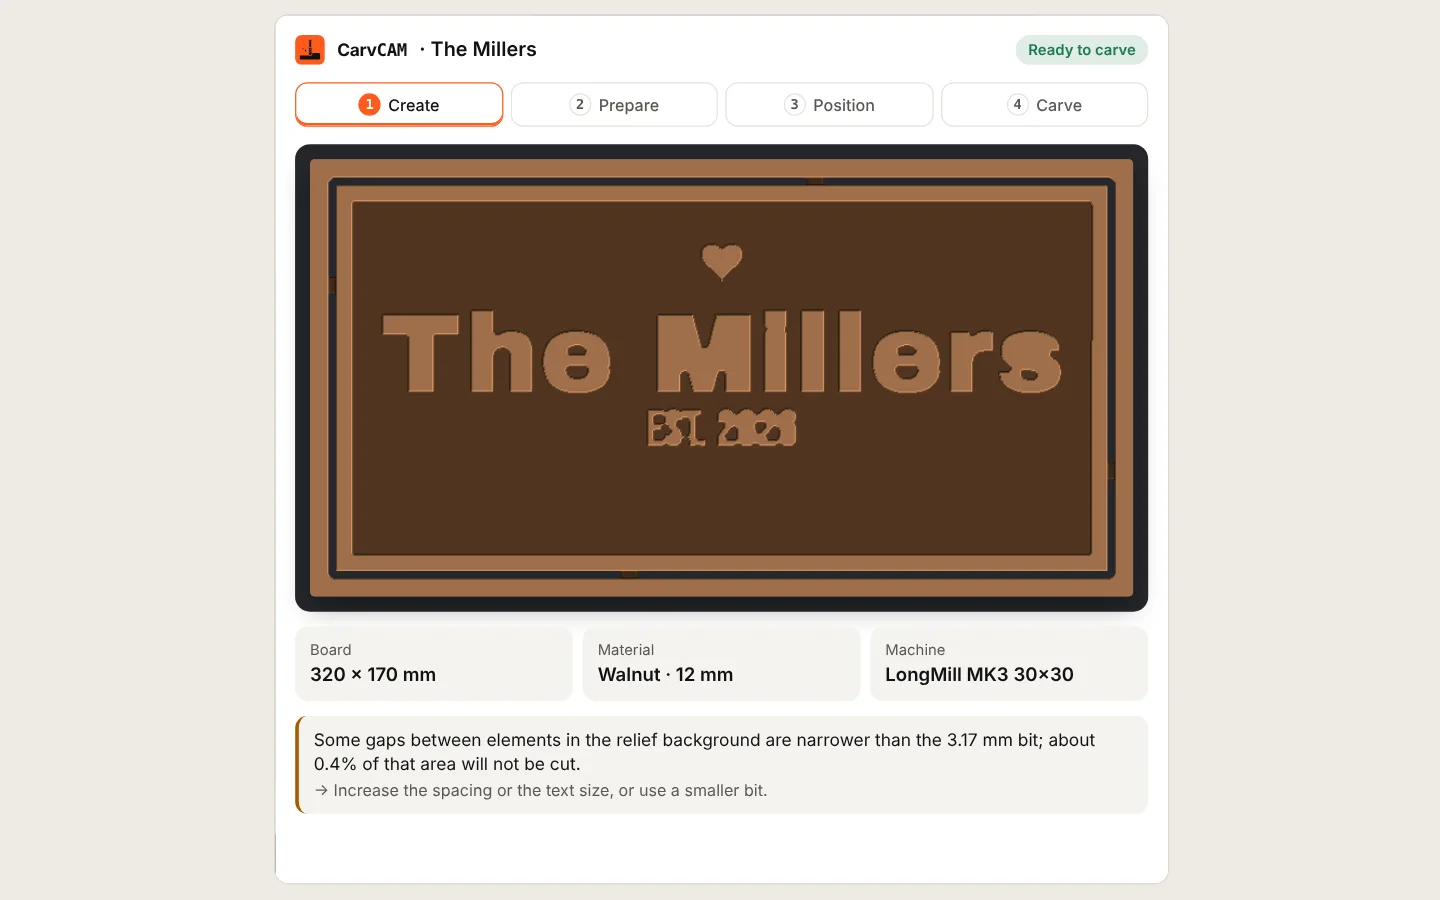
1 · Create
A top view of the carved board, made by simulating the real toolpaths in your wood's colors. Below it: board size, material and machine, and any warnings with how to fix them.
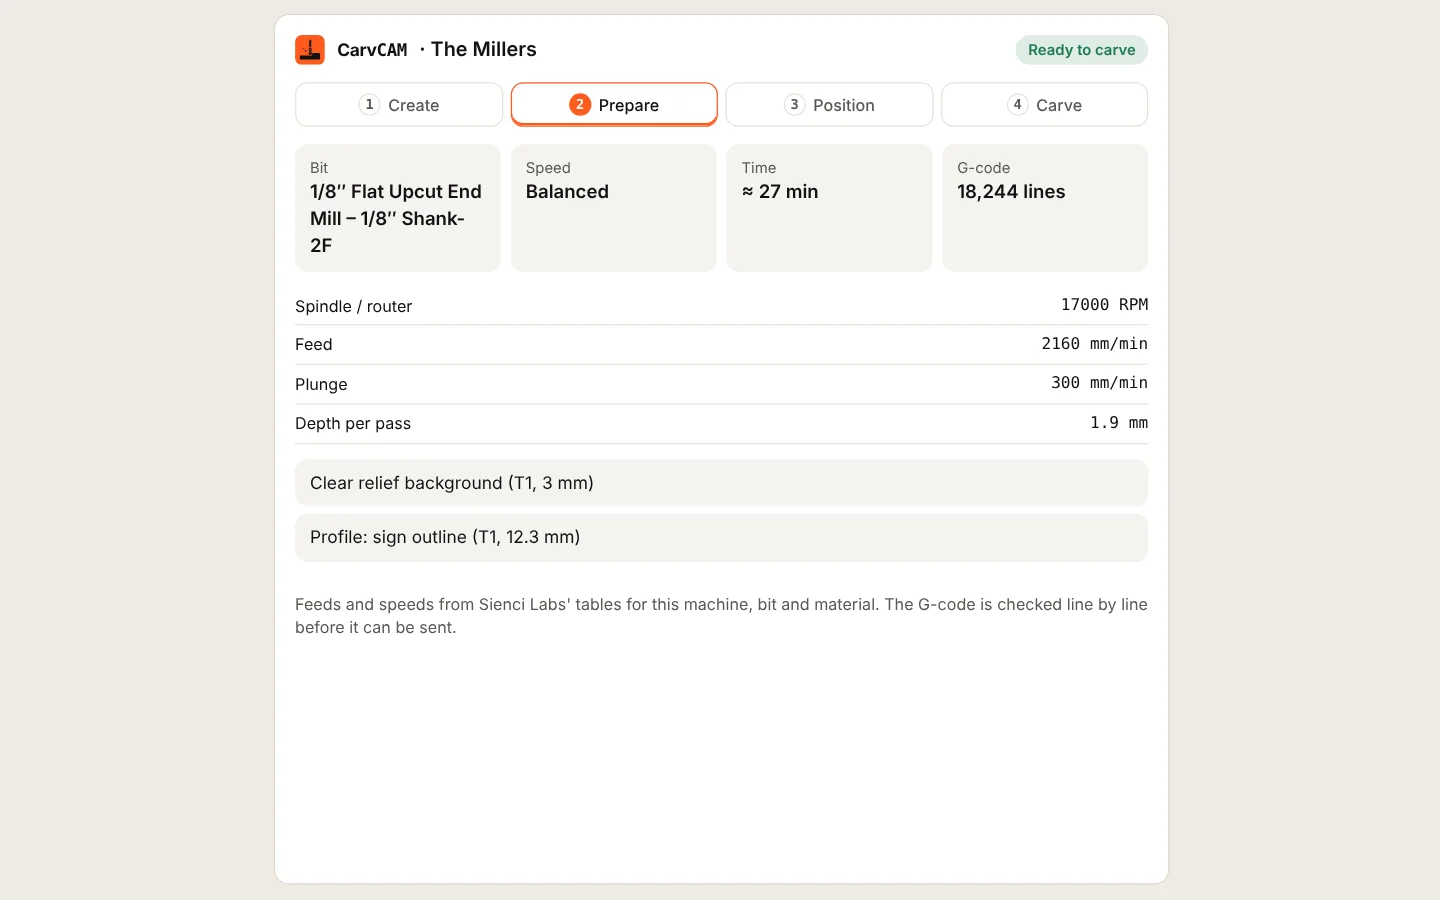
2 · Prepare
The bit, speed preset, time estimate and G-code size, with RPM, feed, plunge and depth per pass from Sienci's tables, and each operation in order.
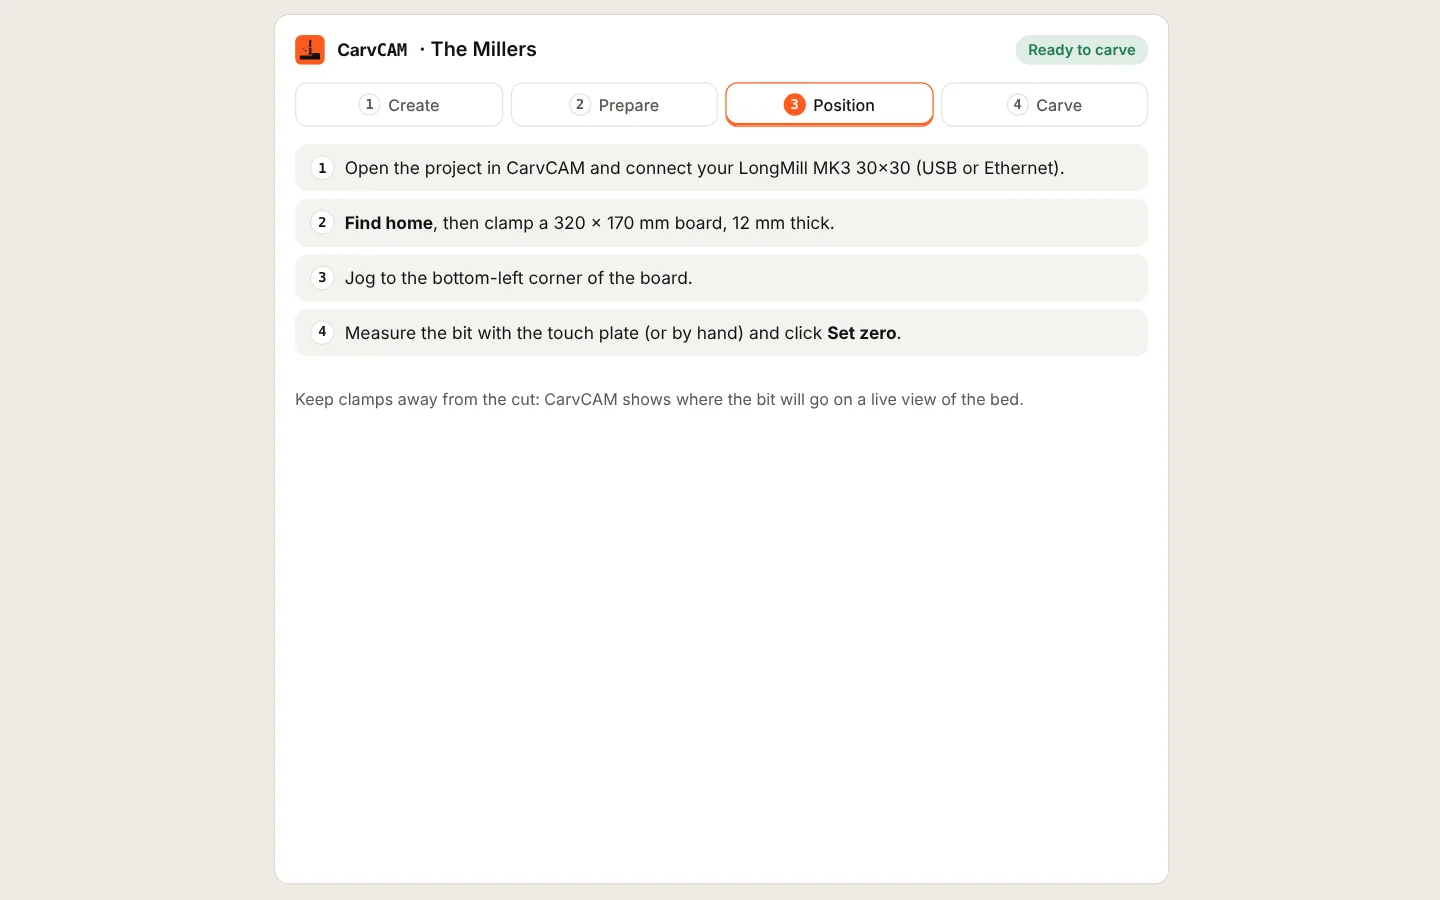
3 · Position
Where work zero goes on the board, and how to clamp and set it in CarvCAM.
4 · Carve
The carve checklist and two buttons: Open in CarvCAM and Get the G-code file.
Some Claude apps don't show connector cards yet. Claude then answers in text with the same status, warnings, time and the Open in CarvCAM link.
Open it in CarvCAM
Open in CarvCAM opens app.carvcam.com (sign in or create a free account if asked) with the project in Create. Check the 3D preview, then go on to Prepare, Position and Carve as usual. The project is saved in My projects as a Draft right away, and marked Carved when the carve finishes. In the desktop app, use My projects to continue it there.
Ask for changes
Keep talking in the same chat: “make the text bigger”, “switch to oak”, “use the 60° V-bit”, “add a border”. Claude sends the whole design again with the same project id, so the new Open in CarvCAM link updates the same project in My projects instead of adding a new one. The app says ‘Updated “The Millers” with the latest changes’.
Get the G-code file
Ask “give me the G-code” or click Get the G-code file in the card. Claude only makes the file when the design is Ready to carve, and it's checked line by line like in Prepare. Carving from CarvCAM is still the simplest route: it sets zero with you and runs the checklist.
Troubleshooting
| What you see | What to do |
|---|---|
| Claude says it can't reach CarvCAM | Check the URL is exactly https://carvcam.com/mcp, the connector is on in this chat, and try again in a minute |
| The design isn't accepted on the first try | That's normal: Claude reads the warning and fixes it. If it stops, ask it to “fix what CarvCAM reports and check again” |
| Every change adds a new project | Ask Claude to reuse the projectId from the last result, or reconnect the connector to get the latest version |
| Old layout or missing tools | Disconnect and connect CarvCAM again in Settings › Connectors, then start a new chat |
| Open in CarvCAM asks me to sign in | Projects are saved to your account: sign in or create a free account. A new account starts with the 7-day Pro trial |
Claude designs signs and lettering with the same tools you have in Create. Imported files, traced pictures, inlays and copies are made in the app.