
Connect your machine
The connect wizard shows where every cable goes, connects, and proves that the machine really responds. Open it from Not connected at the top of the screen.
CarvCAM connects to the controller itself; you don't need gSender. Only one program can use the connection, so if gSender or another sender is connected, close it first.
Start
The wizard already knows the controller that comes with your machine. Choose Show me the cables, or Everything is already plugged in.
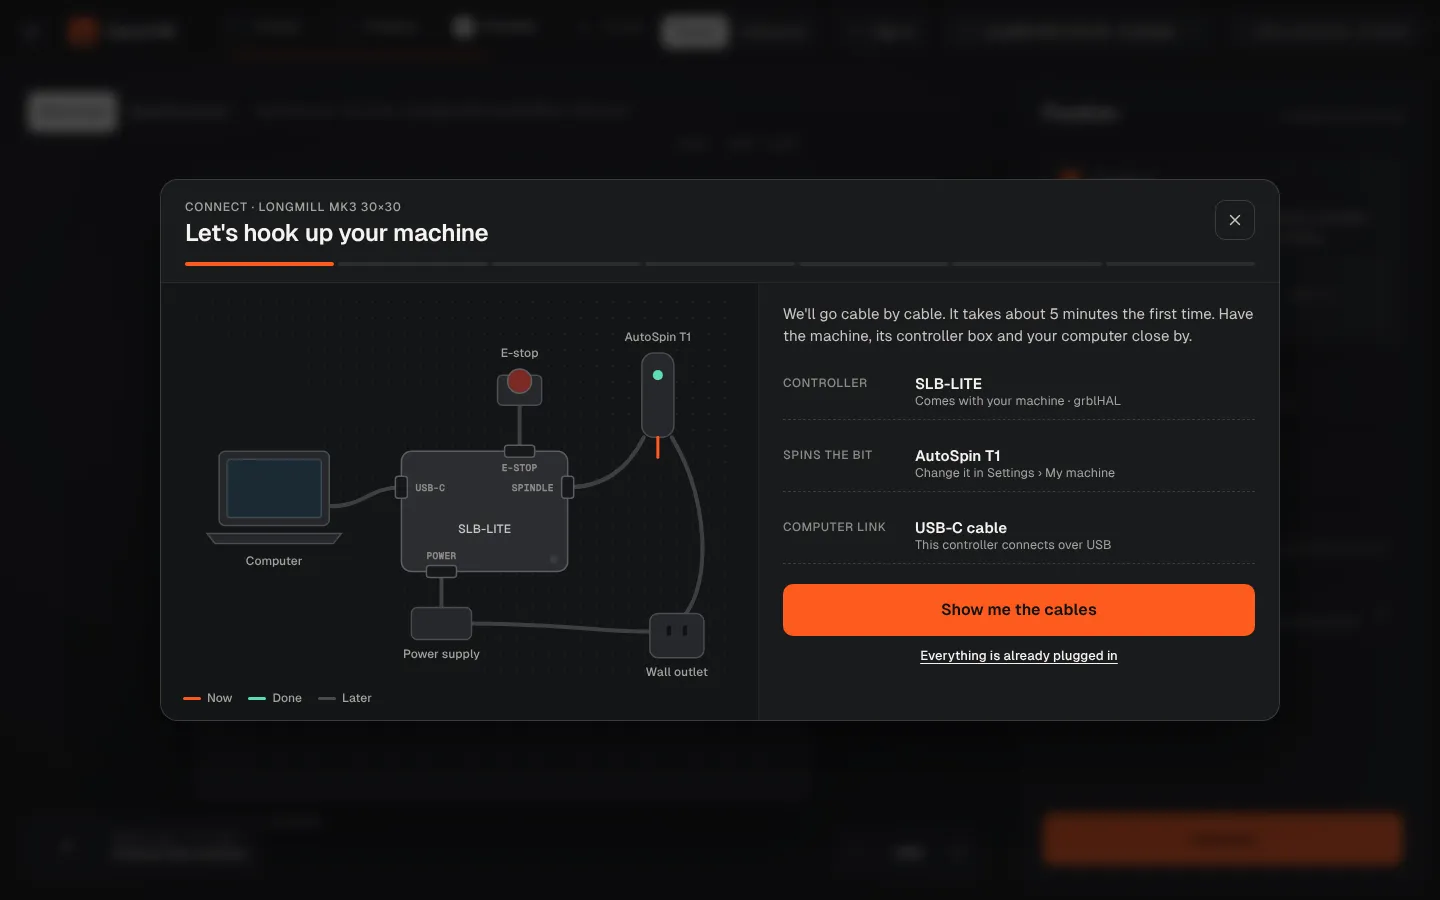
Follow the cable map
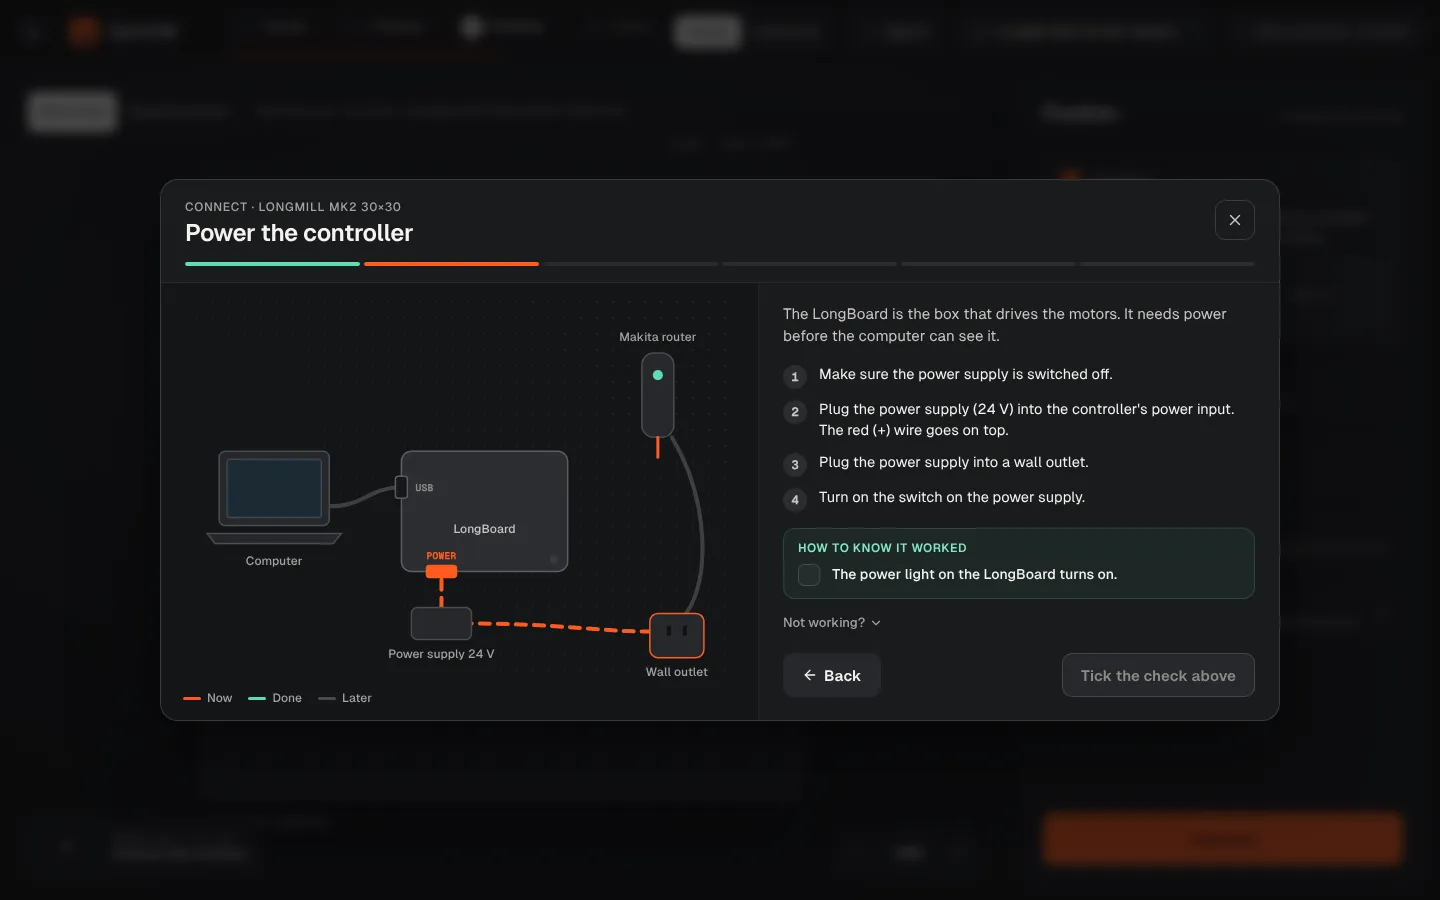
A drawing of your setup is on the left. Each step says what to do, how to know it worked, and what to try if it didn't. Tick the confirmation to move on.
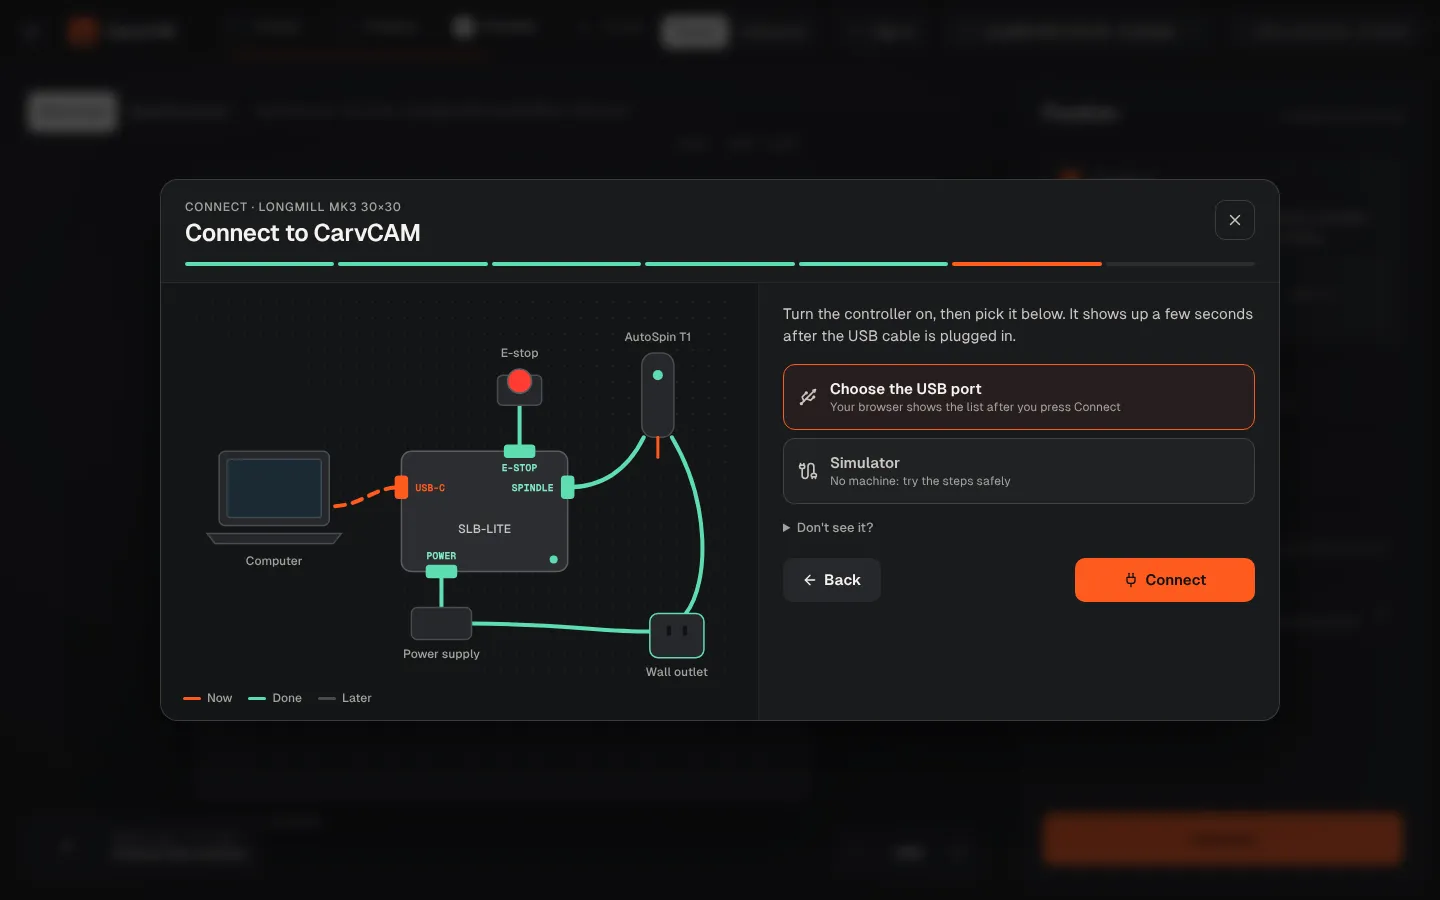
Pick the controller
It appears in the list a few seconds after you plug in the cable. Select it and click Connect.
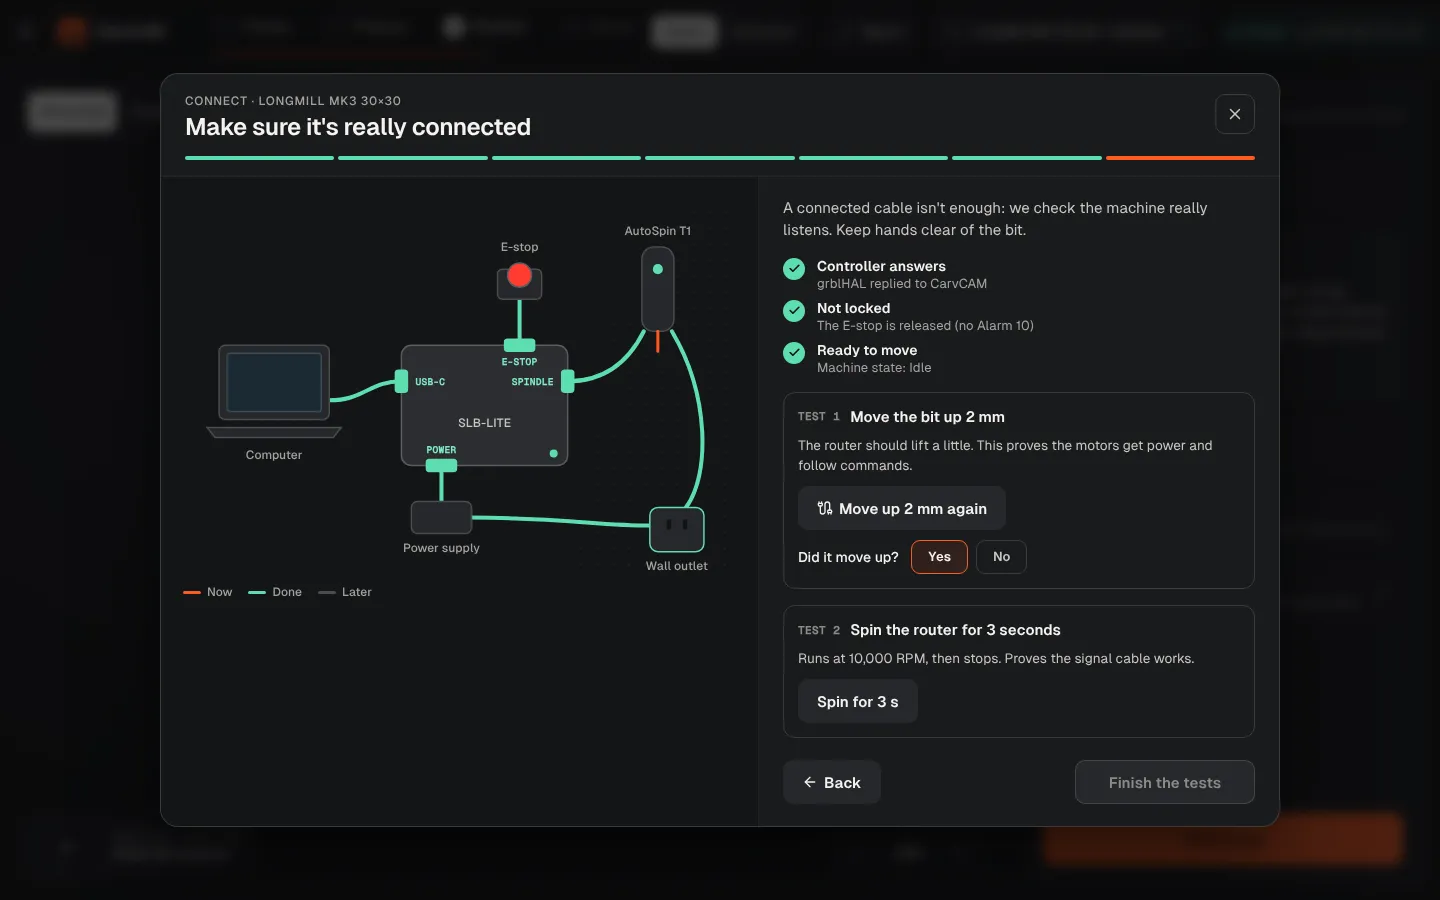
Prove it works
CarvCAM checks the controller's reply. Then the Z lifts 2 mm and the bit spins for 3 seconds. Answer Yes to each. If the machine started locked, click Unlock.
Cable map colors
| Color | Meaning |
|---|---|
| Orange | The cable to connect now |
| Green | Already connected |
| Gray | Next steps |
How the app reaches the controller
The desktop app has a small built-in connector that opens the USB port or the Ethernet connection; nothing else to install. It only accepts connections from CarvCAM on your own computer. On Linux, USB access comes with the .deb; with the AppImage, join the dialout group once (Install).
Choose Simulator in the list: every step works the same and the carve only happens on screen.
CarvCAM remembers your setup and goes straight to the connection with Everything is already plugged in. The cable map stays available.