
Set up your workshop
The first time you open CarvCAM, three short screens ask what you have. CarvCAM uses the answers to set speeds, depths and suggestions for your exact setup.
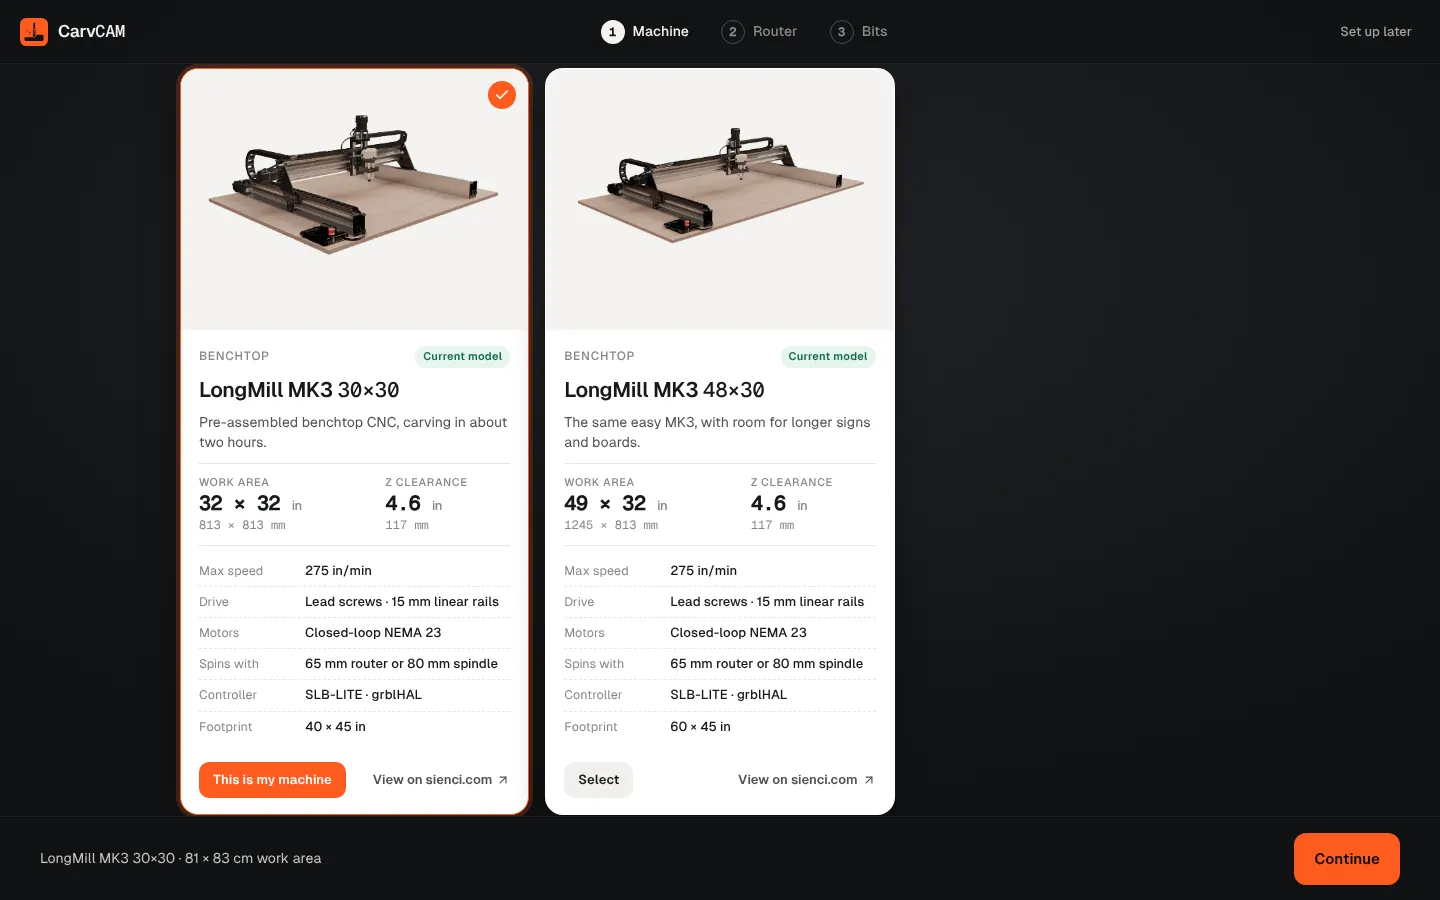
Pick your machine
Each card shows the work area, Z height and specs. Click yours: LongMill MK3, LongMill MK2 or AltMill, in the size you own.
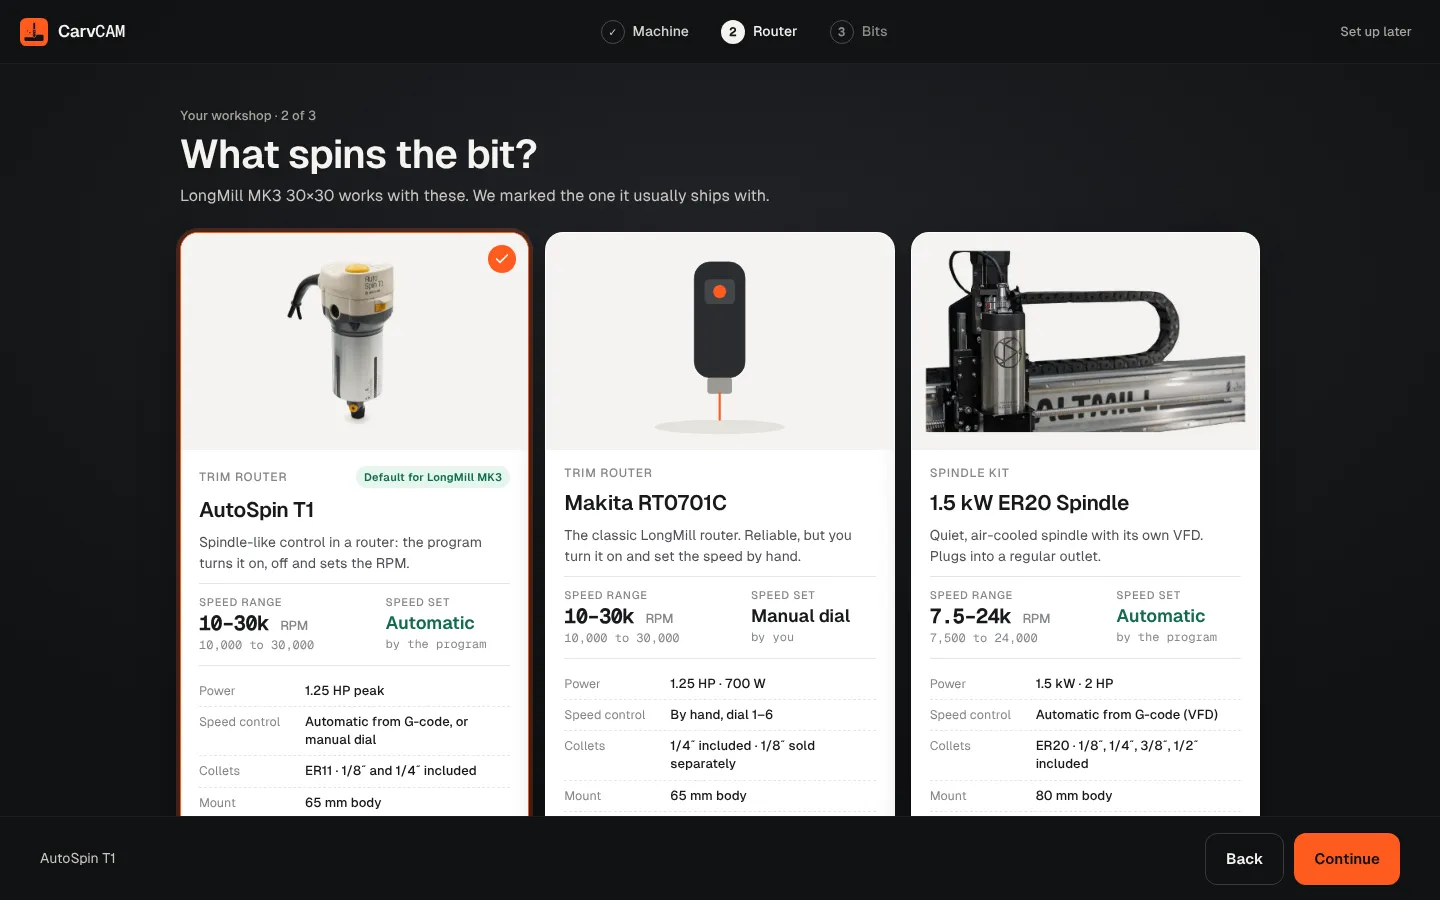
Pick what spins the bit
AutoSpin T1, Makita RT0701C or a spindle kit. CarvCAM shows the speed range, how speed is controlled and the collets.
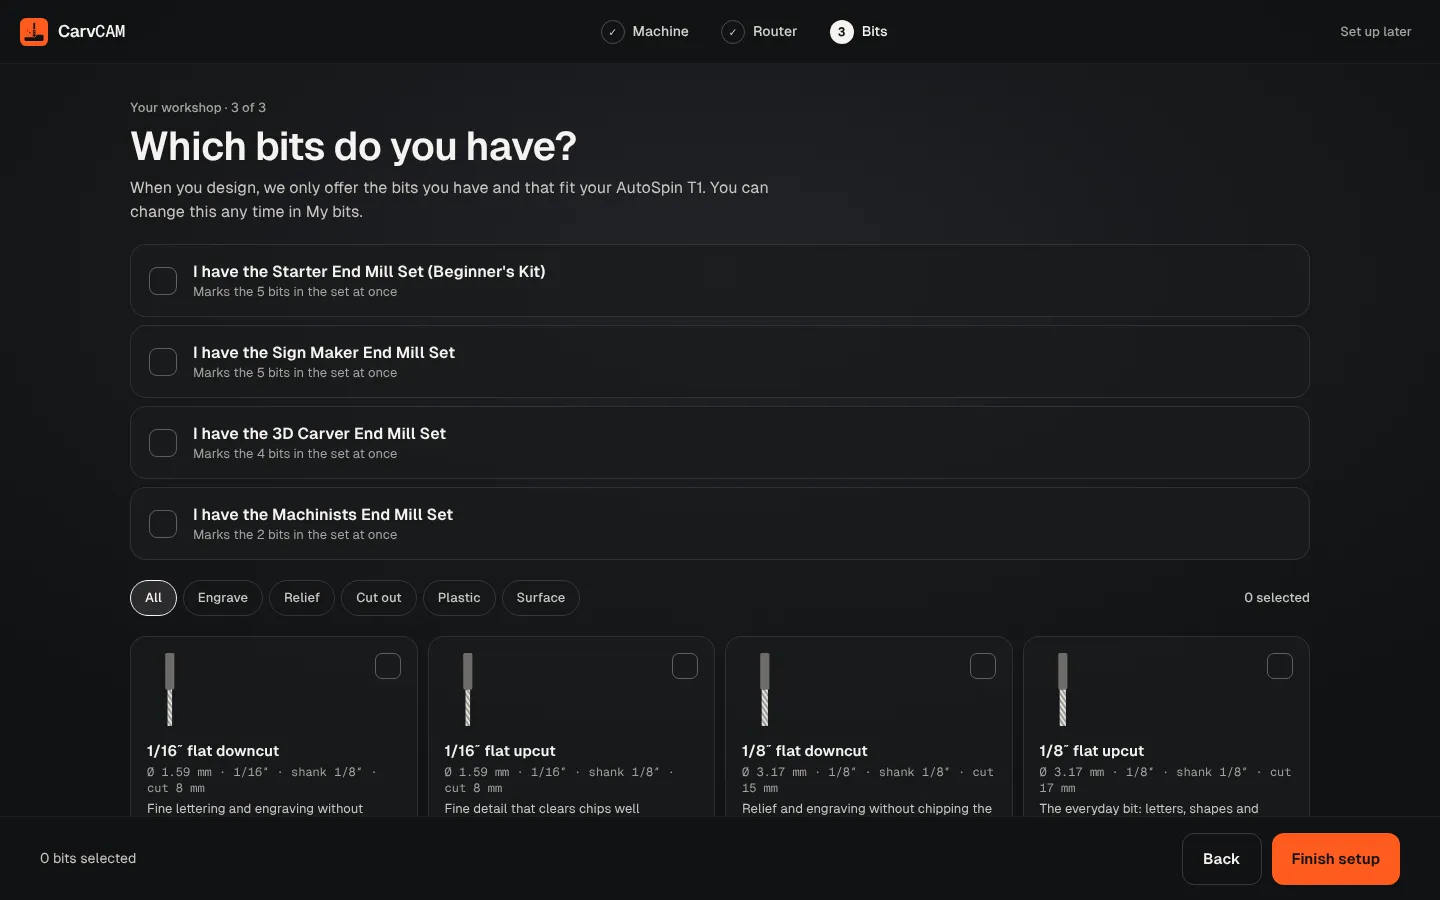
Tick the bits you own
Tick the bits you have, or pick the Sienci set you bought to add all its bits at once. CarvCAM only suggests projects and cuts that use bits you have.
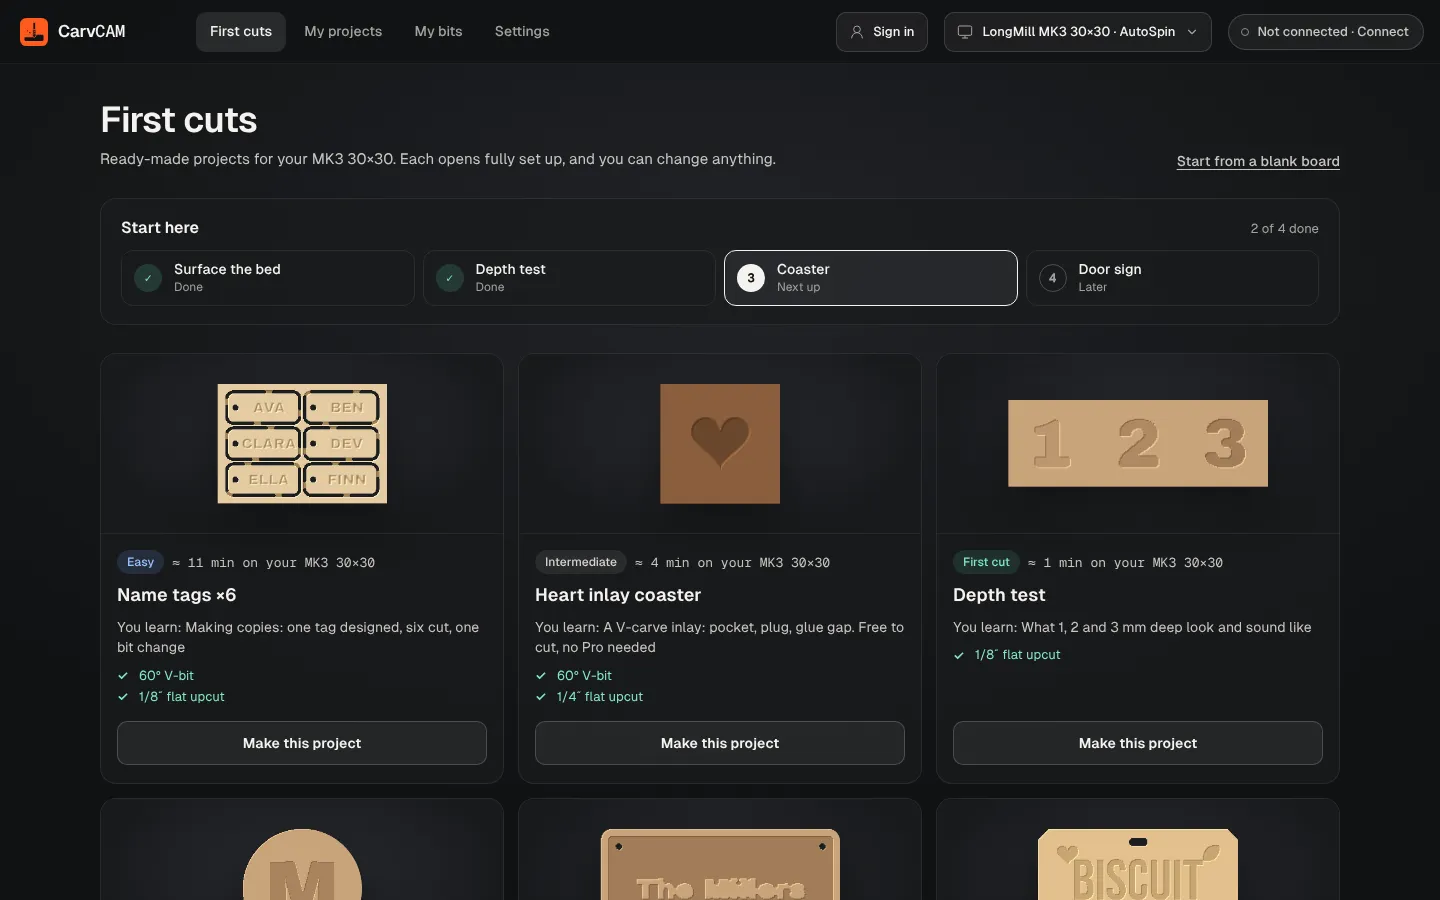
First cuts
After setup, First cuts lists projects made for your machine and bits, from a depth test on scrap MDF to a raised door sign. Each one says what you learn by making it. Two show newer tools: Name tags ×6 (Make copies) and Heart inlay coaster (V-carve inlay, free to cut).
Change it later
The menu at the top left opens First cuts, My projects, My bits and Settings. Change what spins the bit in Settings › My machine (Settings). Add or remove bits any time in My bits (Bits and feeds).
Own more than one machine? Click Change machine in Settings to add another, then switch from the machine name in the top bar.